

EU Ship No Tax [Auto 5% Off $2309] Korhex for Flex – Boot Glitch and MCU Access Tool


1. Launch X431 8% Off
11.16-11.30
2. Autel Update Services
11.16-11.27
3.Flex 10% Off
4. ALIENTECH 42% Off
Better price, Contact us Seven
whatsapp: +86 18223445829
Product Description
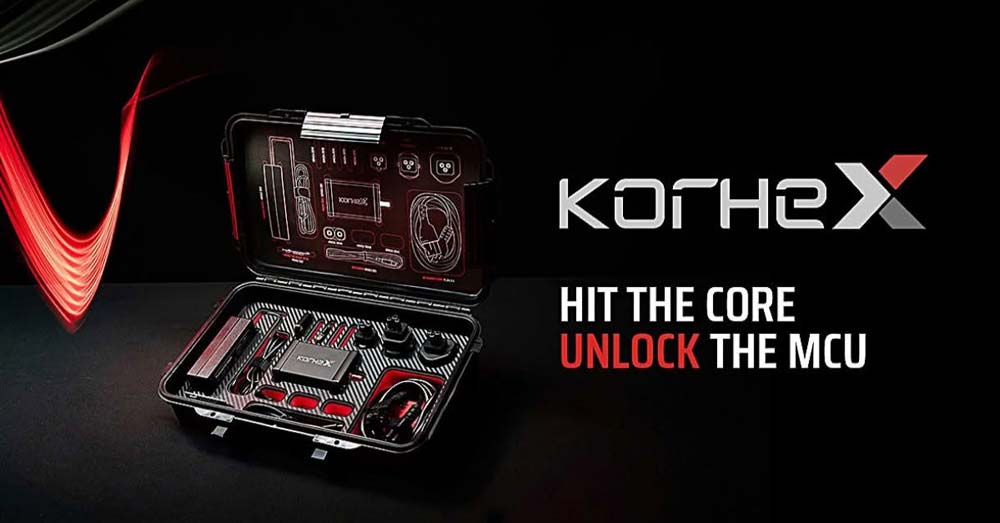
WHAT IS KORHEX?
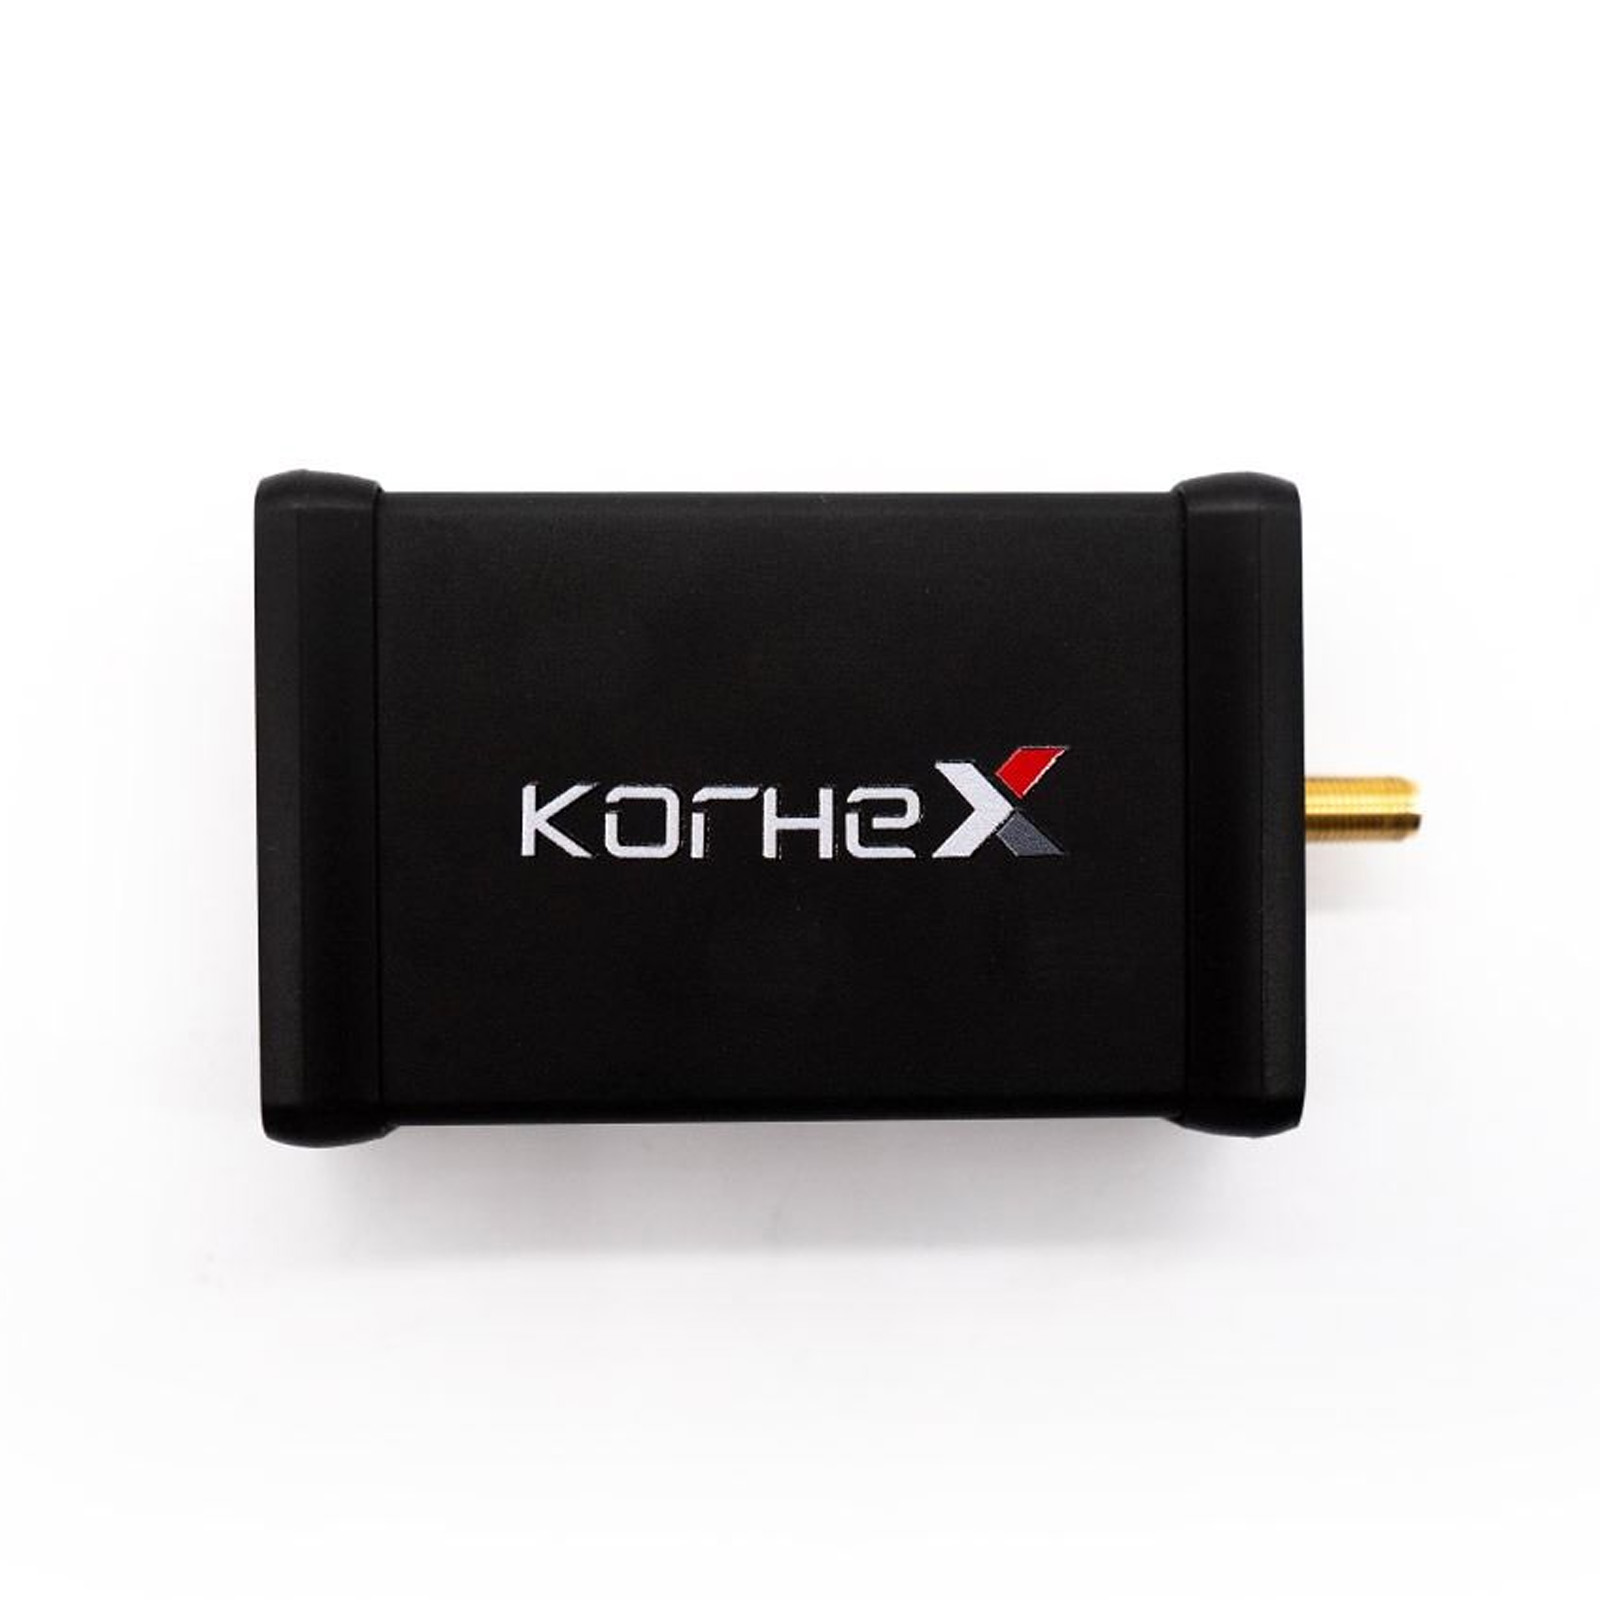
A Flex Add-On for Direct MCU Access
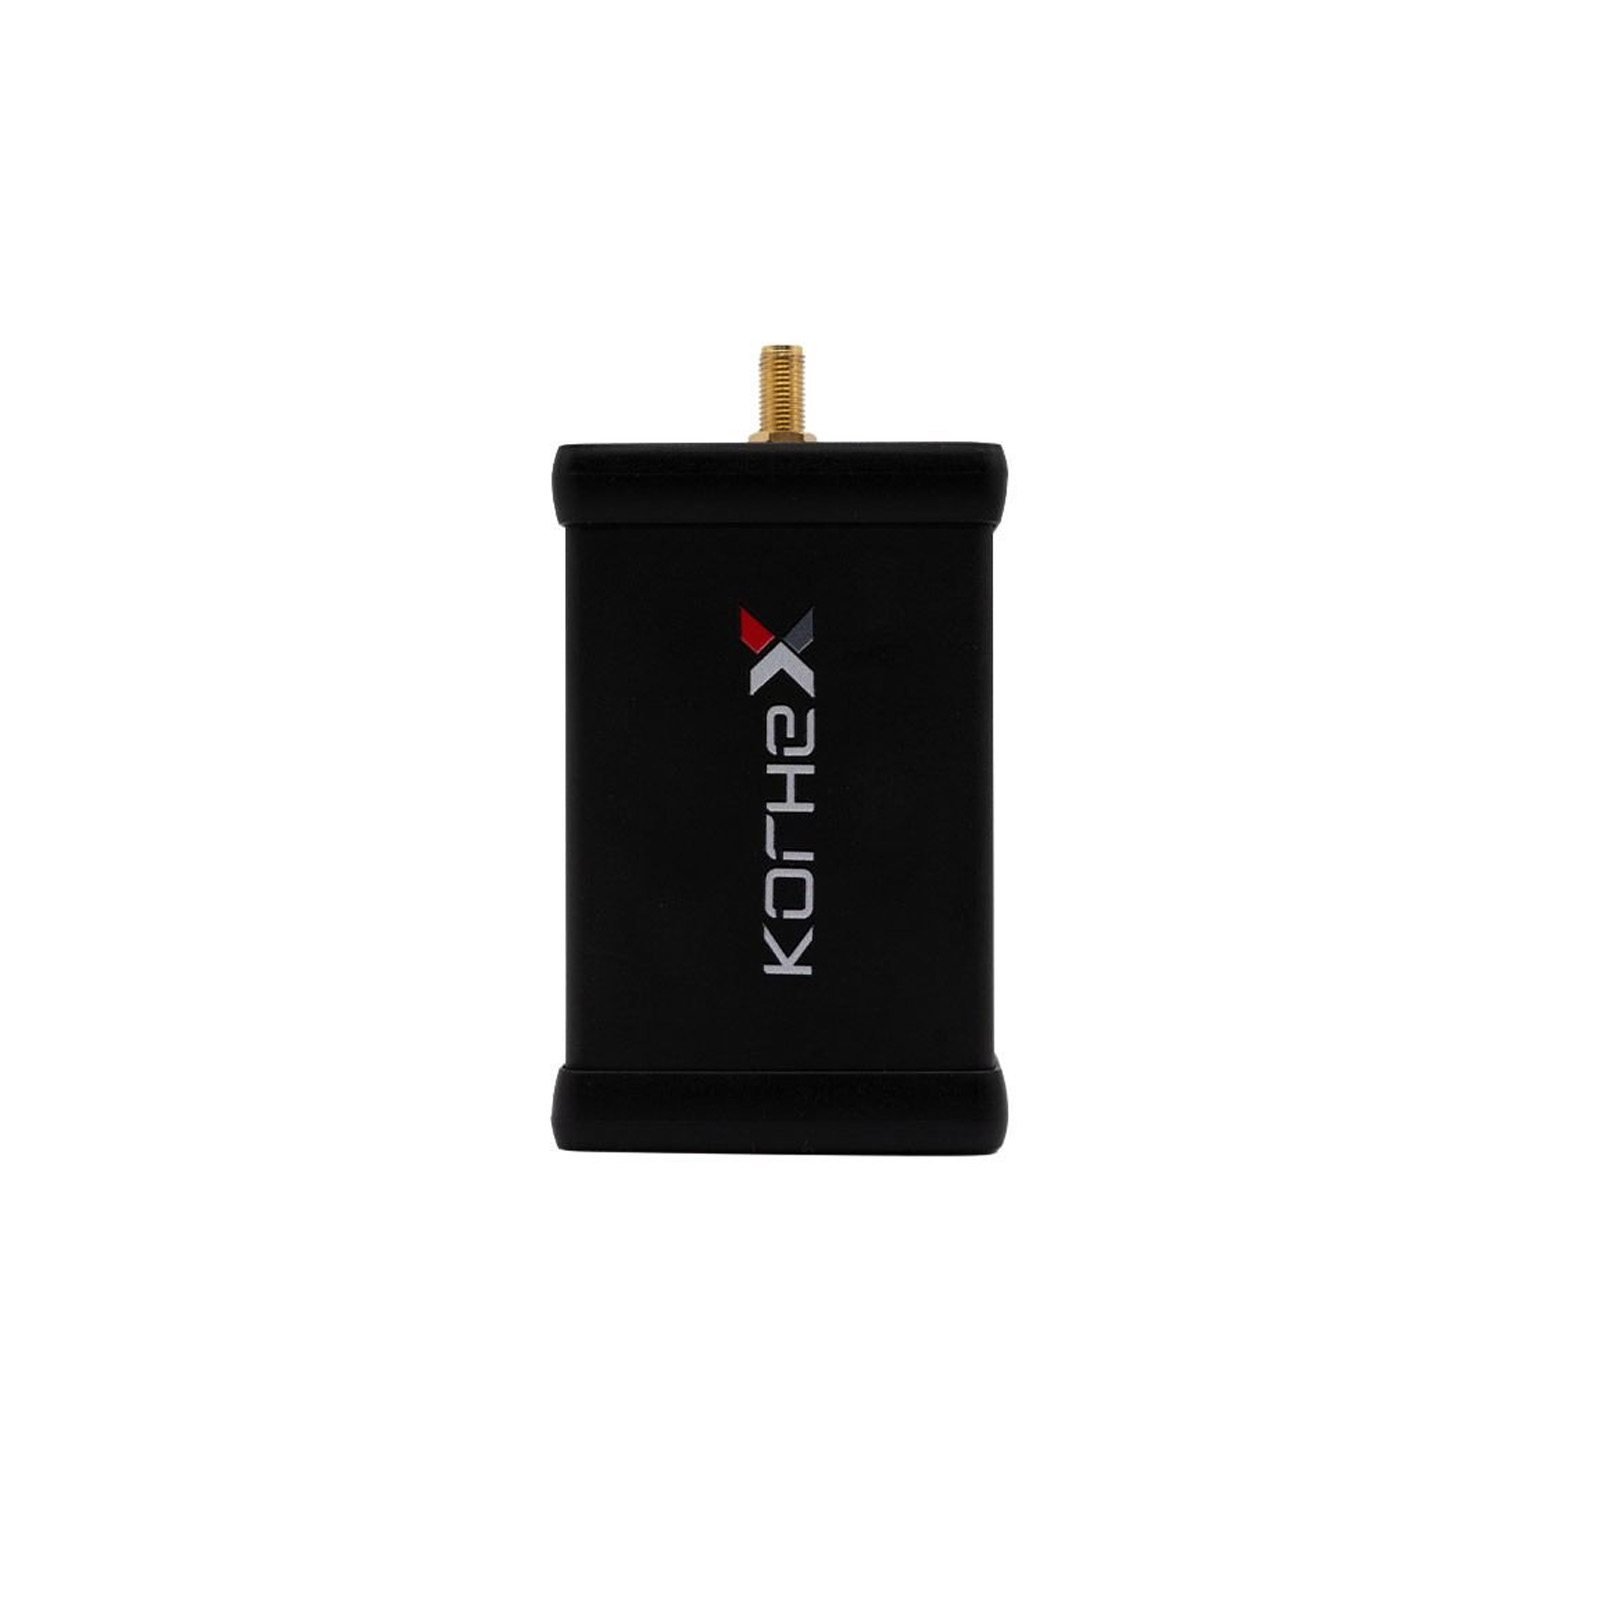
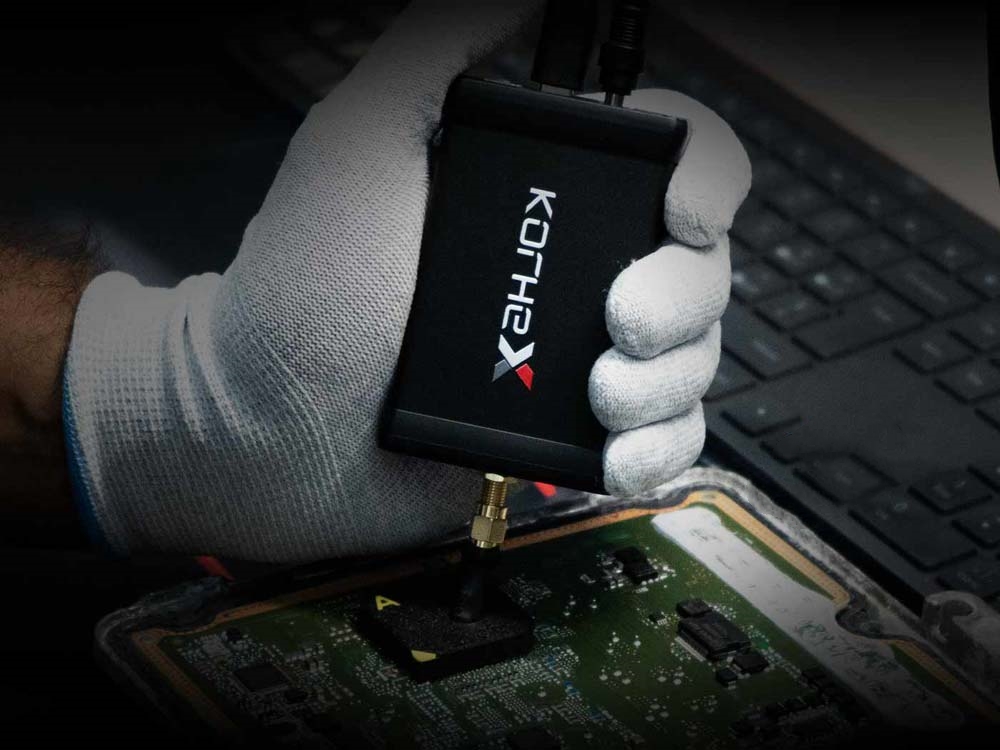
Korhex is a hardware add-on for Flex, designed for direct MCU access during supported ECU unlocking procedures. It works with Flex’s Boot Glitch workflow to simplify access to protected ECUs, reducing the need for board flipping, resistor desoldering and manual Boot pin wiring.
Unlocking a protected ECU usually means physical work before any software step: flipping the PCB, desoldering resistors, wiring Boot pins by hand. Each extra step adds time on the bench and risk of damage to the board. Korhex is built to simplify that stage, a single dedicated MCU contact point instead of manual rework.
How to choose:
For Flex Full Master and Full Slave customers, only the Korhex device needs to be purchased.
Flex customers who do not have a Full configuration must add the Boot Glitch software license FLS0.20 in addition to the Korhex hardware, or upgrade to Full.
Highlights:
- Direct MCU access on supported ECUs
- No component desoldering
- No manual pin connection
- Support for advanced Boot Glitch procedures
- Full integration with the Flex ecosystem
Supports ECU types:
- Latest-generation Bosch MD1 / MG1
- Mercedes MDG1
- Mercedes Truck CPC5
- Delphi ETC3
- SPC58N processors
- And more new ECU solutions with every FLEX update
On supported ECUs, there is no need for traditional resistor soldering or manually connecting BOOT points – KORHEX communicates directly with the microprocessor, while the procedure is controlled through FLEX.
Features:
Deeper ECU Access
Korhex replaces manual bench preparation with a single MCU contact point, run through Flex.The result isn’t just less prep time, it’s a new way to program control units: a revolutionary connection mode and an advanced access to highly requested, previously unavailable modules.
Boot Glitch Technology
Advanced unlocking procedures developed for protected control units.
New MCU Perspectives
Designed to support the evolution of modern automotive microcontrollers.
Flex Integration
Dedicated procedures and guided workflows built into the Flex ecosystem.
Enhanced Workflow
Reduce physical preparation and simplify complex bench operations.
Growing Coverage
A platform designed for continuous protocol and application development.
Korhex Recent Update
Update Mercedes truck CPC5 after 2020 boot glitch unlocking with Korhex.
Update Mercedes Bosch MD1CP001 and MG1CP002 boot glitch unlocking with Korhex.
Update BRP MG1CA920 SPC58N boot unlocking with Korhex.
Update DAF Delphi ETC3 UDS boot unlocking with Korhex.
How Korhex works?
Korhex has been designed to integrate advanced hardware access directly into the Flex ECU programming workflow. It interacts directly with a specific contact point on the ECU microcontroller to enable the access required by supported advanced programming and unlocking procedures.
Korhex uses a specific contact point on the microprocessor to perform the access procedures provided for supported devices.
Thanks to Boot Glitch technology and integration with Flex, the workflow requires less preparation and reduces physical handling of the ECU board.
1. Connect & Position
Prepare the ECU per the Flex-guided procedure and place Korhex on the designated MCU contact point via its dedicated masks.
2. Access & Unlock
Perform the required access and unlocking operation on supported ECUs - no desoldering, no manual Boot pin wiring.
3. Unlock
Run the access and Boot Glitch procedure provided for the supported ECU.
4. Program
Continue directly in Flex with the standard programming procedure. The workflow is now integrated end-to-end inside the Flex procedure you already use.
Technical Specs
Working mode: Boot Glitch
Compatible Flex configurations:
- Full Master / Full Slave
- Flex Boot Glitch FLS0.20M/FLS0.20S
Operations:
- Read/Write Internal Flash, Read/Write
- Internal EEPROM, Full Backup, Boot Unlock
Software environment: Flex
What do you need? Choose your Korhex setup
What you need depends on your current Flex configuration.
NEW CUSTOMER
NOT A FLEX CUSTOMER YET?
If you're not a Flex customer yet, all you need is the Flex Hardware, the Korhex Hardware and a software license to work seamlessly with these two products. [Flex Hardware + Korhex Hardware + Software License]
FULL CUSTOMER
ALREADY A FLEX FULL CUSTOMER?
If you already have a Flex Full Master/Full Slave license and an active subscription, there is a special price only for you: buy the Korhex hardware via Helpdesk and start working.
FLEX CUSTOMER
NOT A FLEX FULL CUSTOMER YET?
If you’re not a Flex Full user, you can buy the Korhex hardware then upgrade your subscription to a Full license or add the Boot Glitch License FLS0.20 and you’re ready to go. [Korhex Hardware + Flex Software license].
Korhex Support for Bosch MDG1 - TC298 and TC299 Flex version 8.27.0.0 Now Available
Korhex support expands to Bosch MDG1 control units equipped with TC298 and TC299 processors.
In addition to the VFI - Voltage Fault Injection procedure, already in use for these units, technicians can now use Korhex to perform the unlock without the need to work on the PCB, thus reducing operation times and manual work.
This new protocol also allows you to unlock the ECU and then work in Bench mode to complete read and write operations, ensuring a faster and more streamlined programming workflow.
In order to use the new protocol, an FLS0.20 Boot Glitch license or a Flex Full FLS0.5 configuration is required.
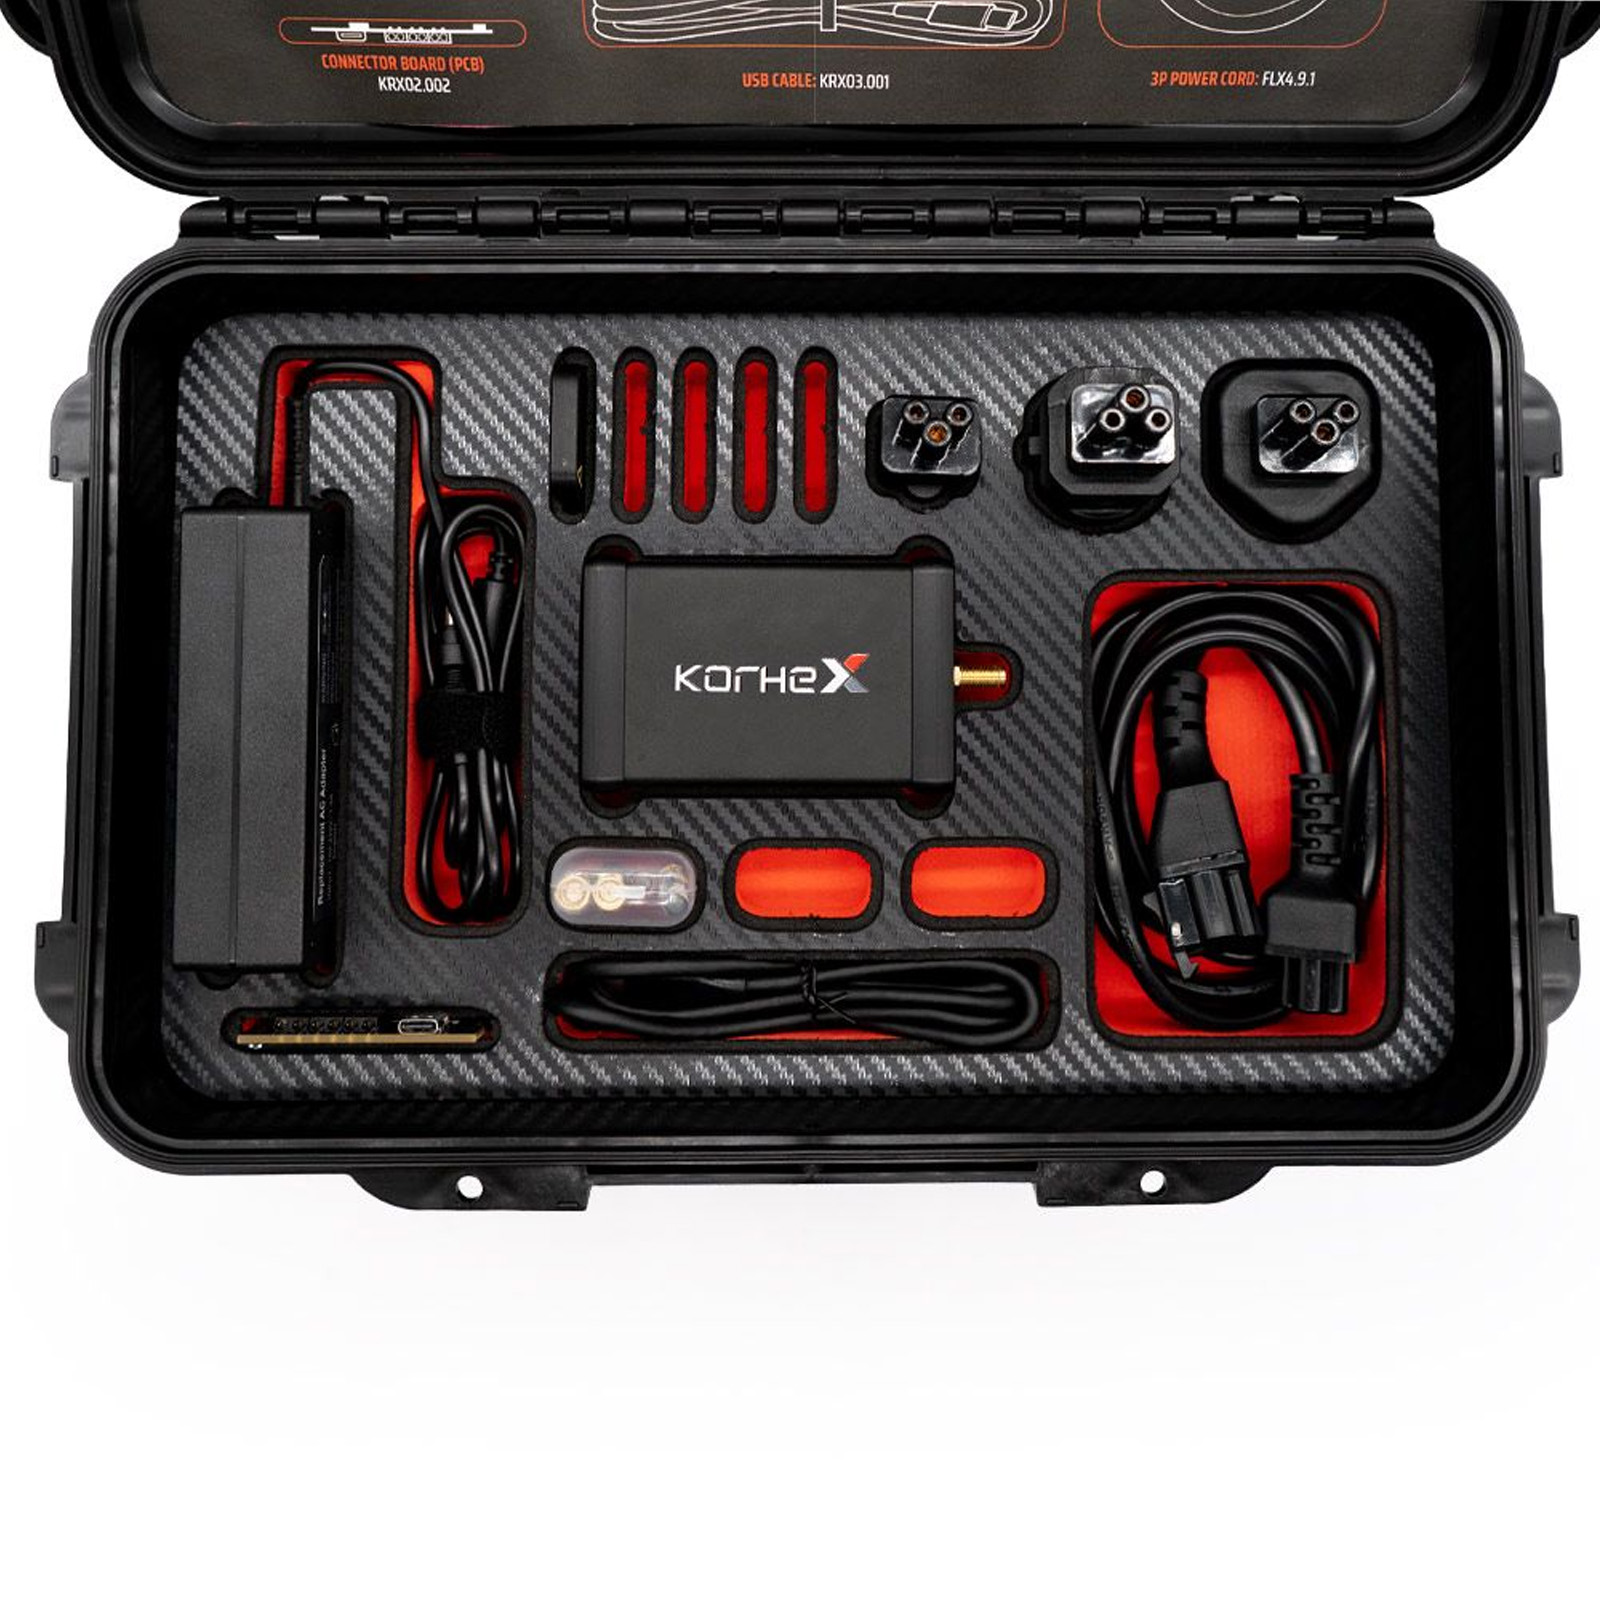
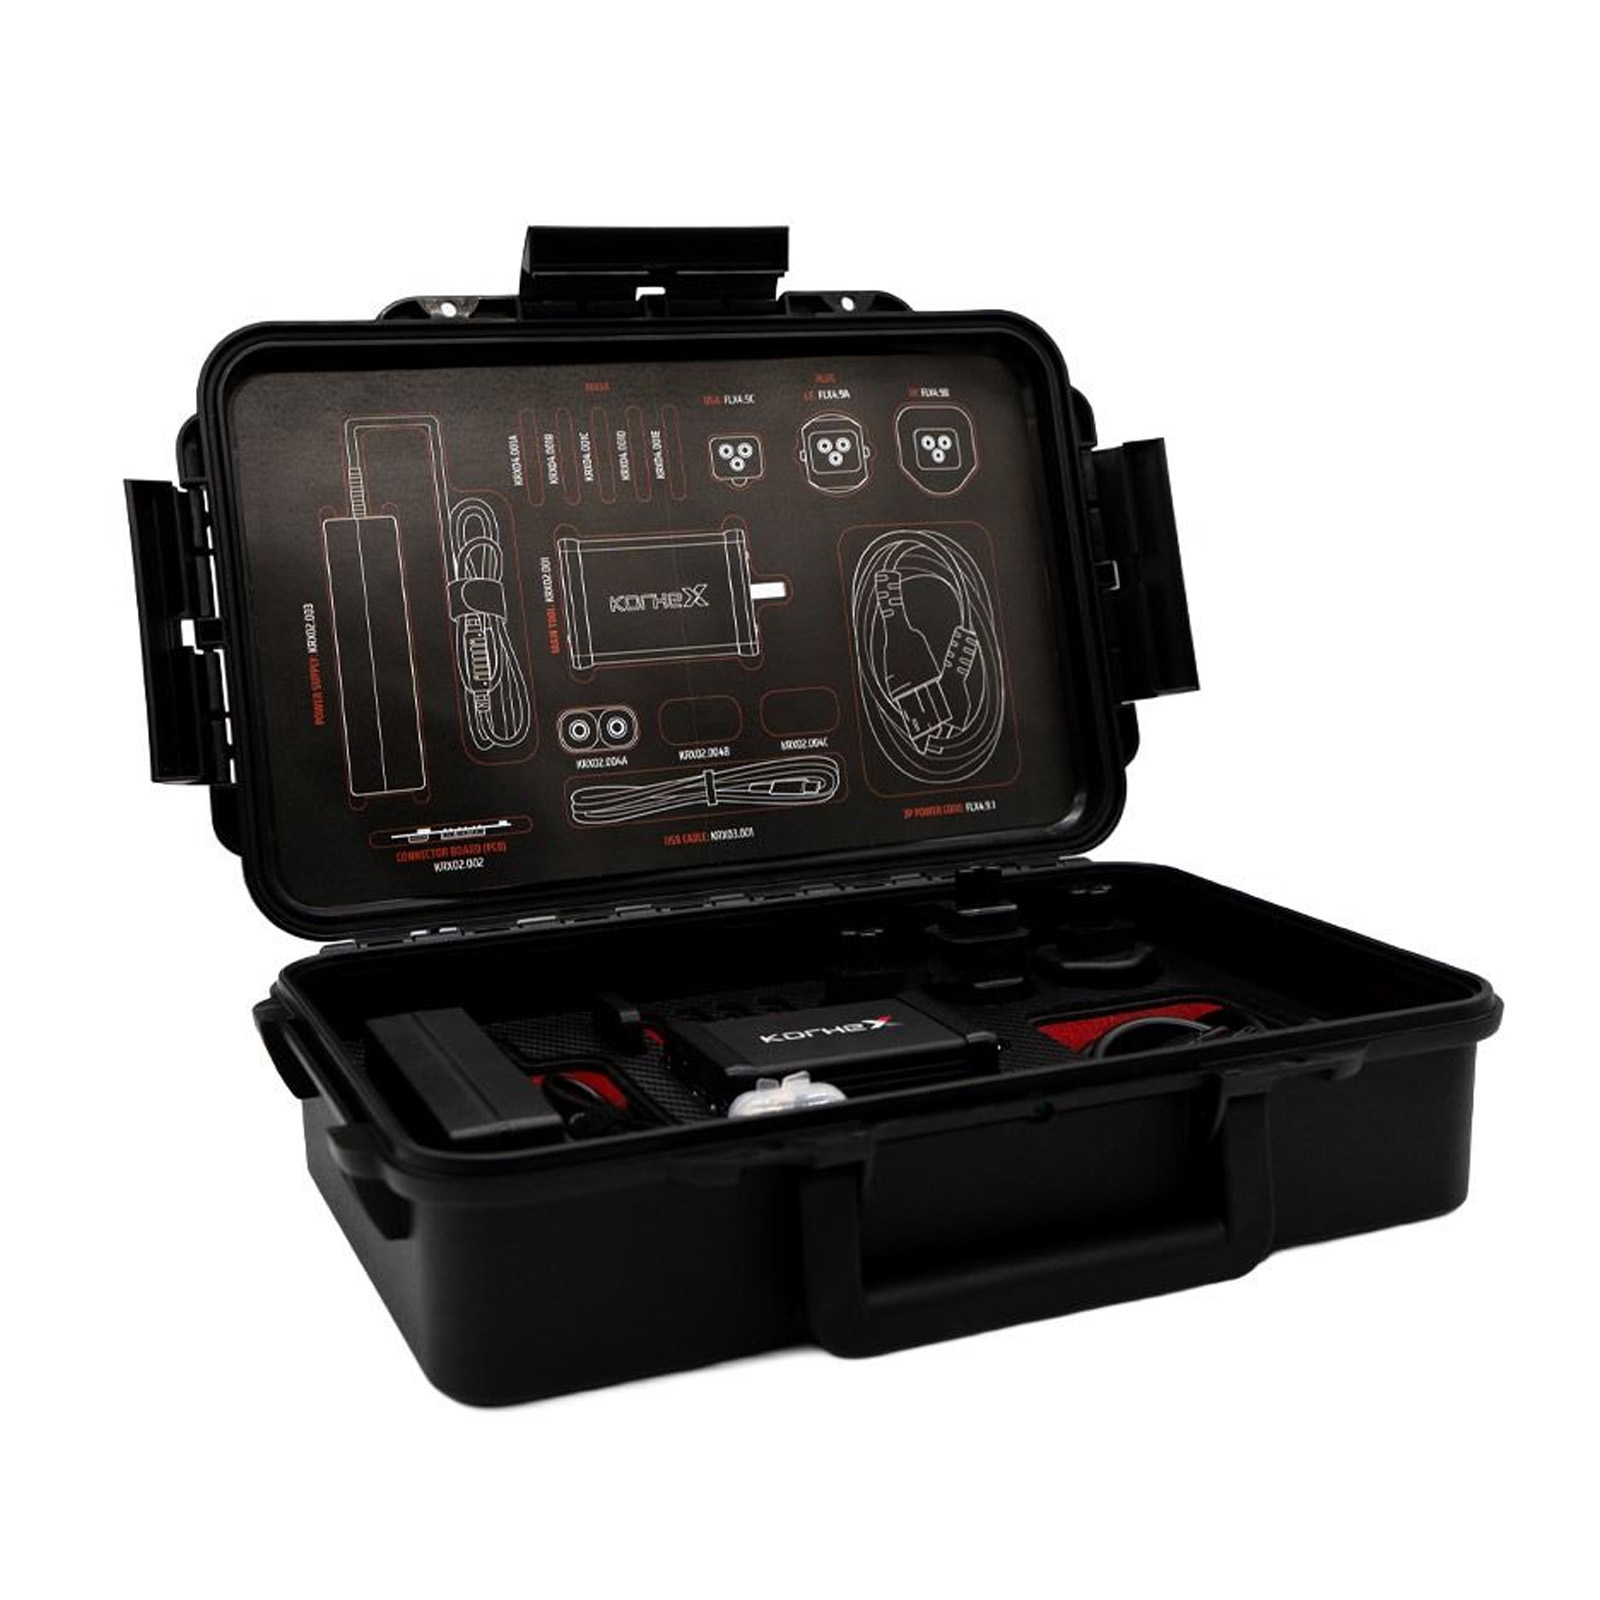
PACKAGE CONTENT
| Item | Description |
|---|---|
| KRX02.001 | Korhex main device |
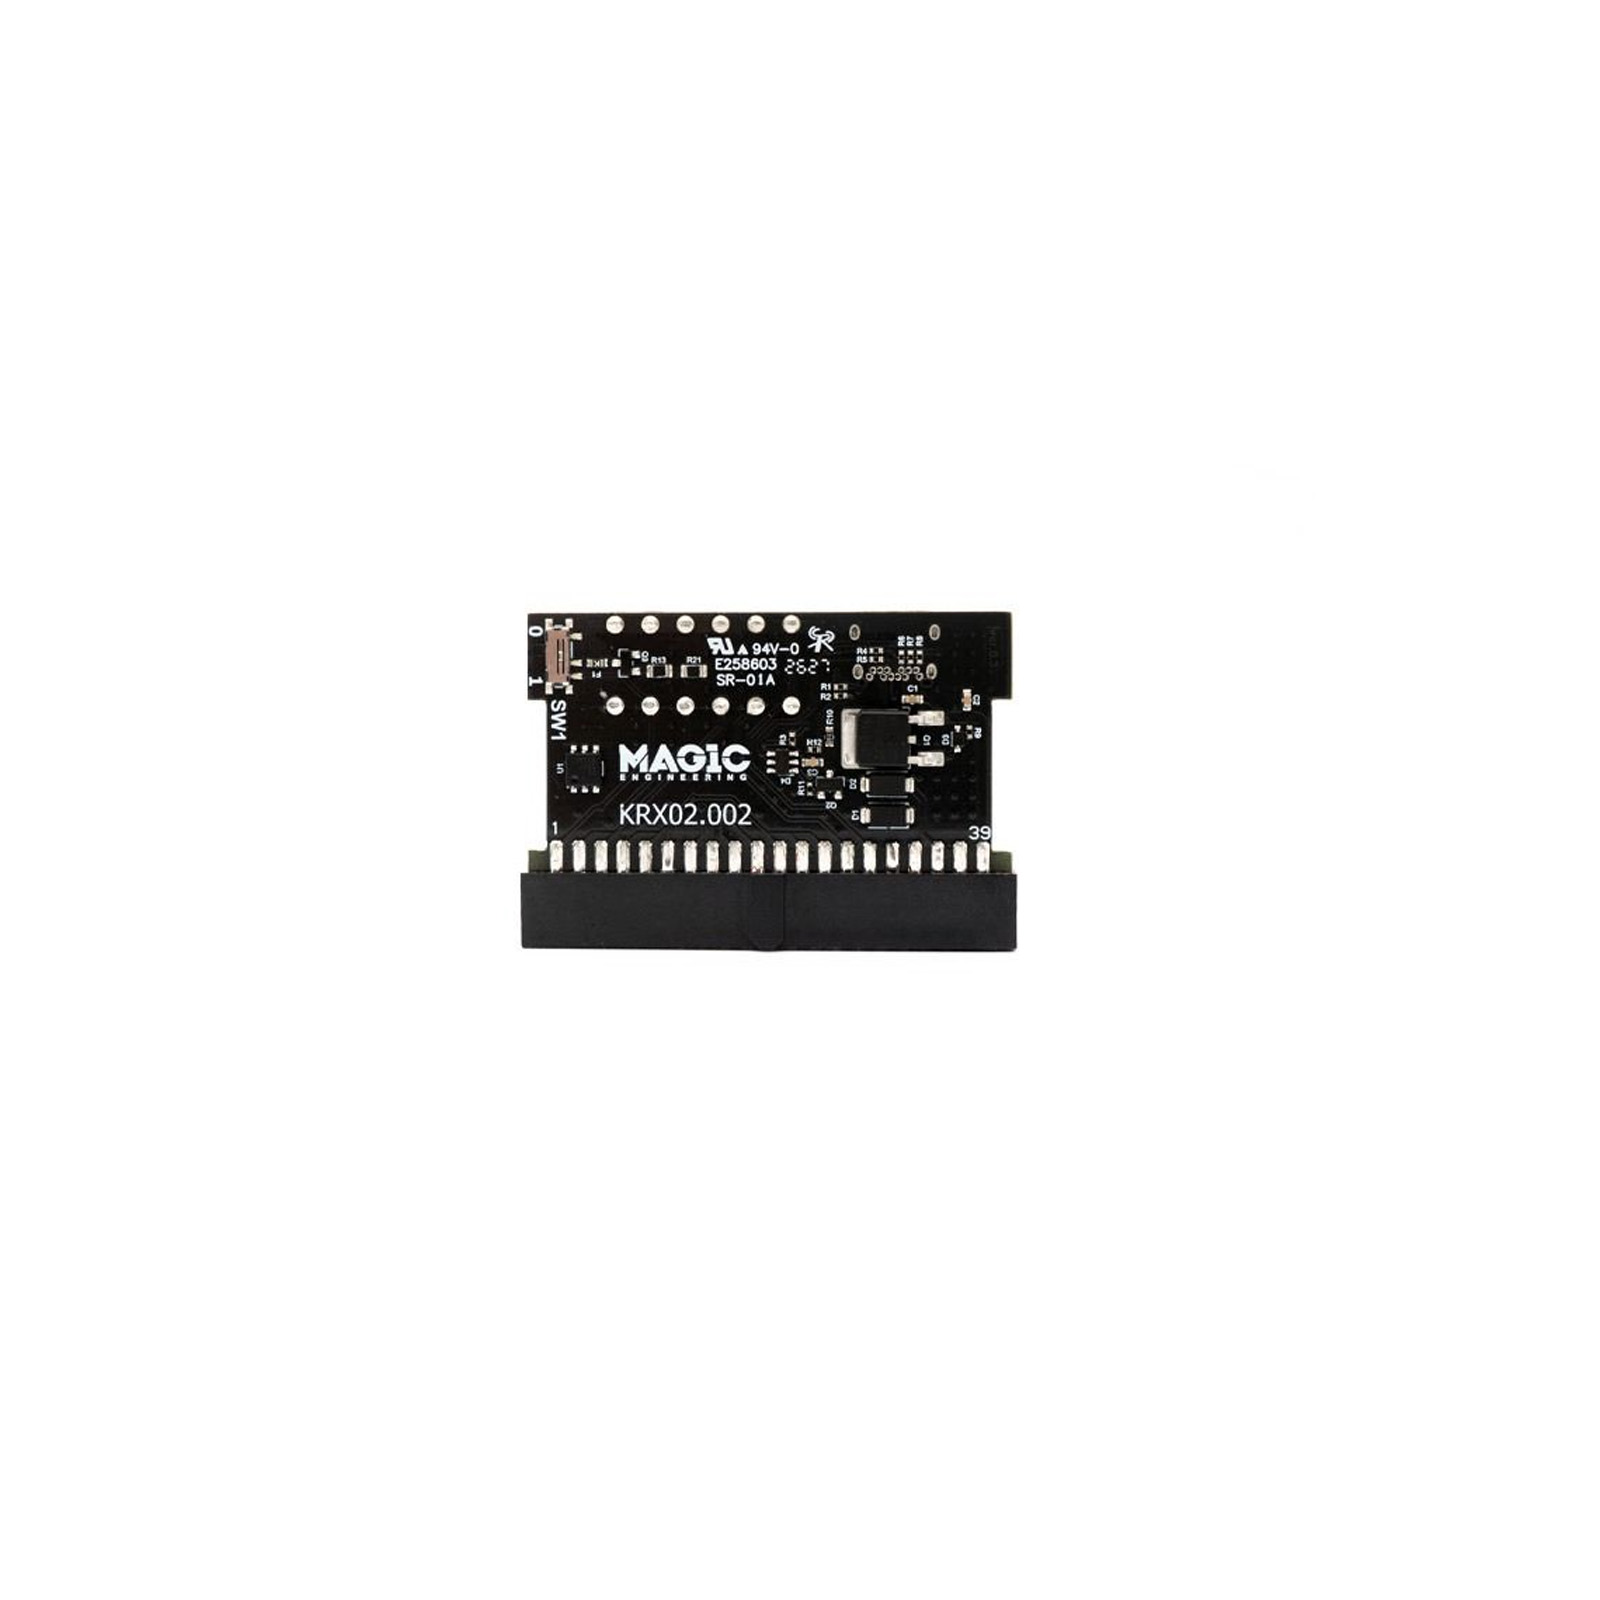
| KRX02.002 | External Korhex |
| KRX03.001 | Korhex USB cable |
| FLX4.9.1 | 3P Power Cord 1.20 m for FLX4.9 |
| FLX4.9A | European plug - Type E/F |
| FLX4.9B | UK plug - Type G |
| FLX4.9C | American plug - Type B |
| KRX02.003 | Korhex power supply |
| KRX02.004A | Korhex Antenna A |
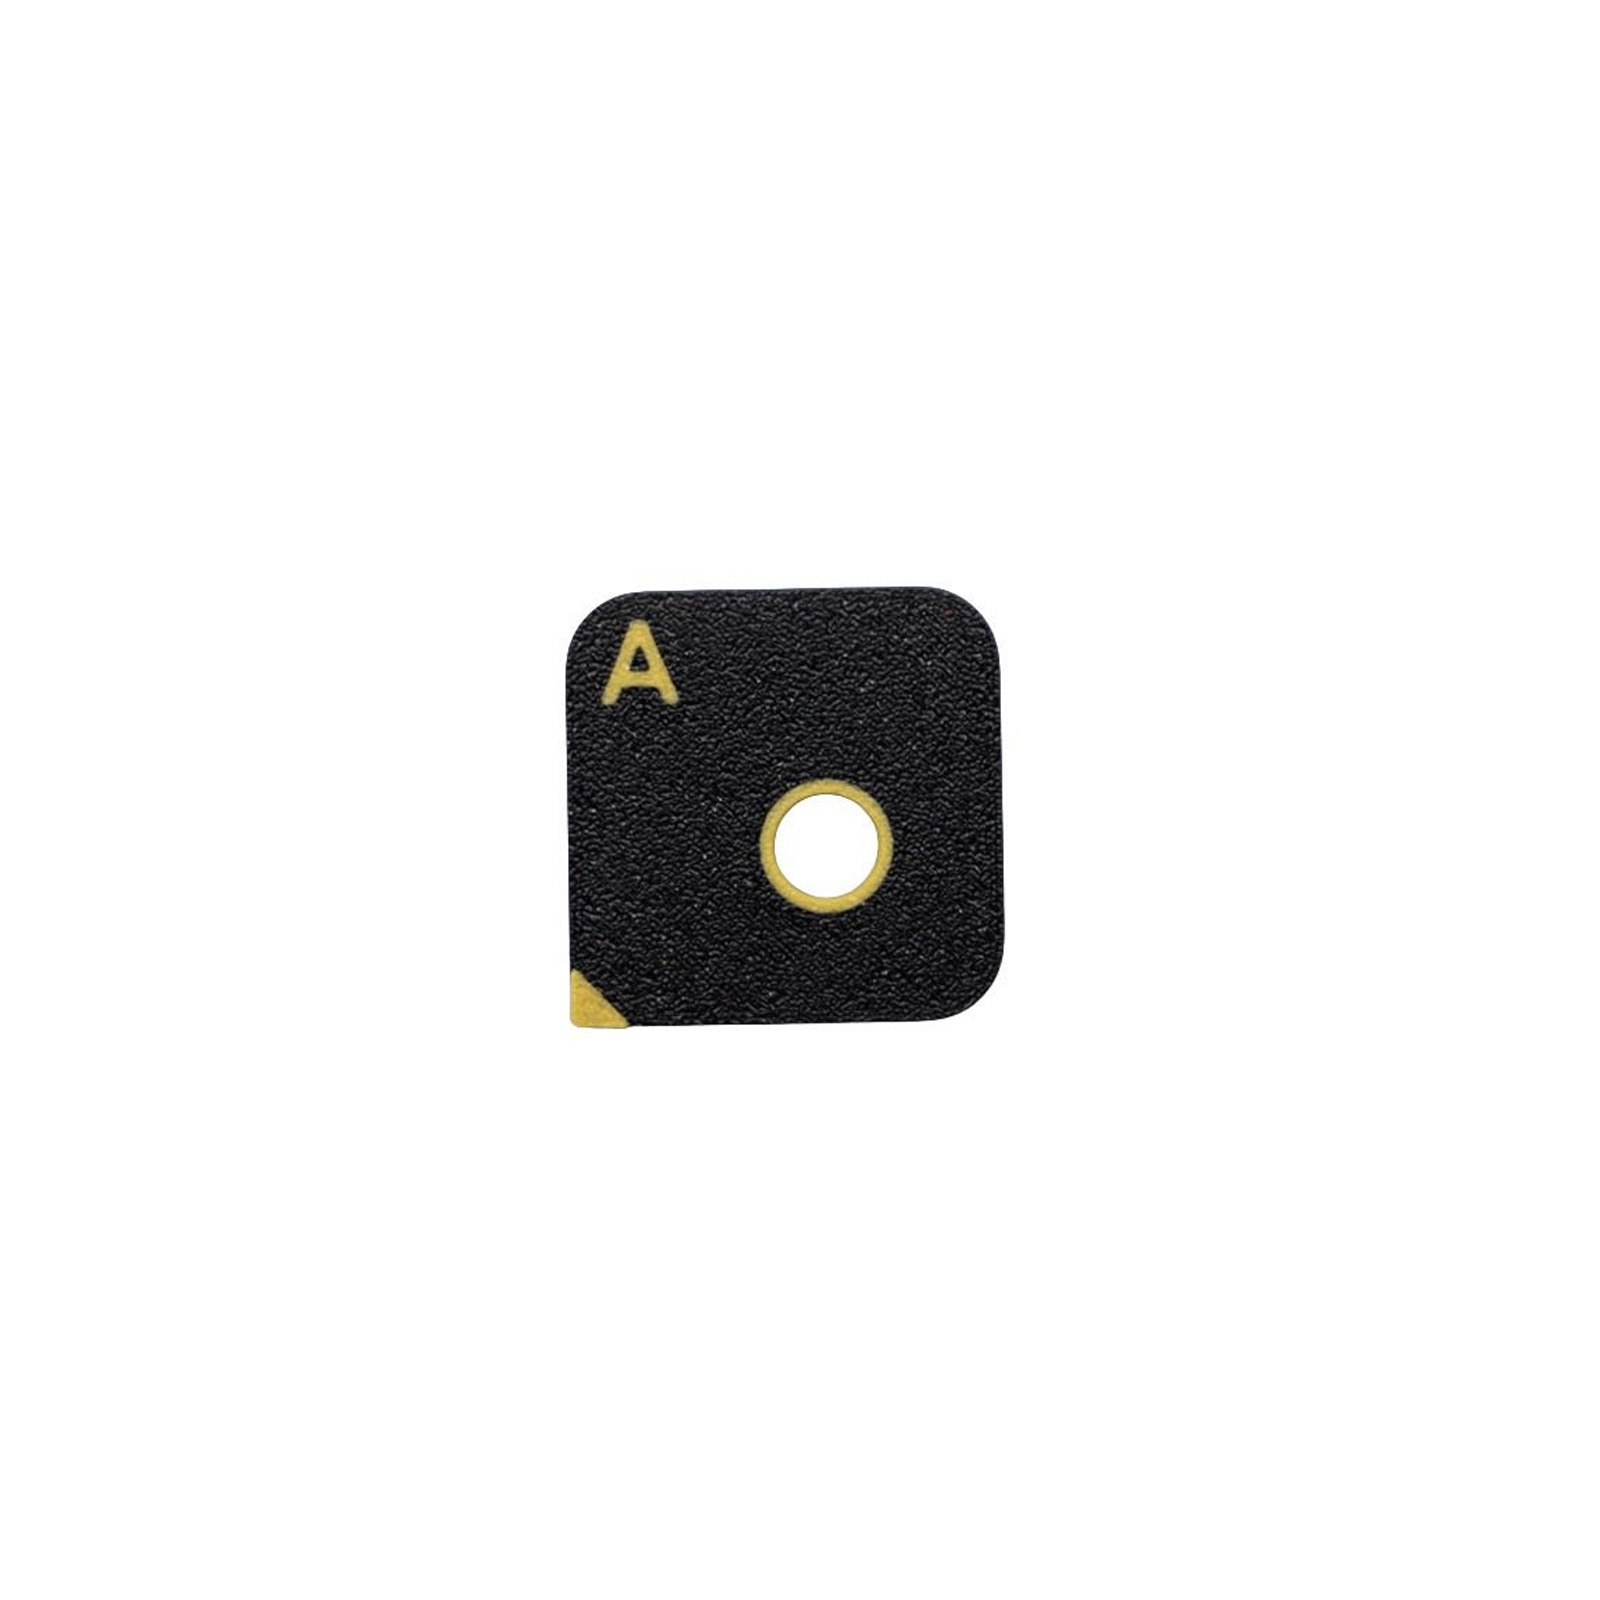
| KRX04.001 | Korhex Mask |
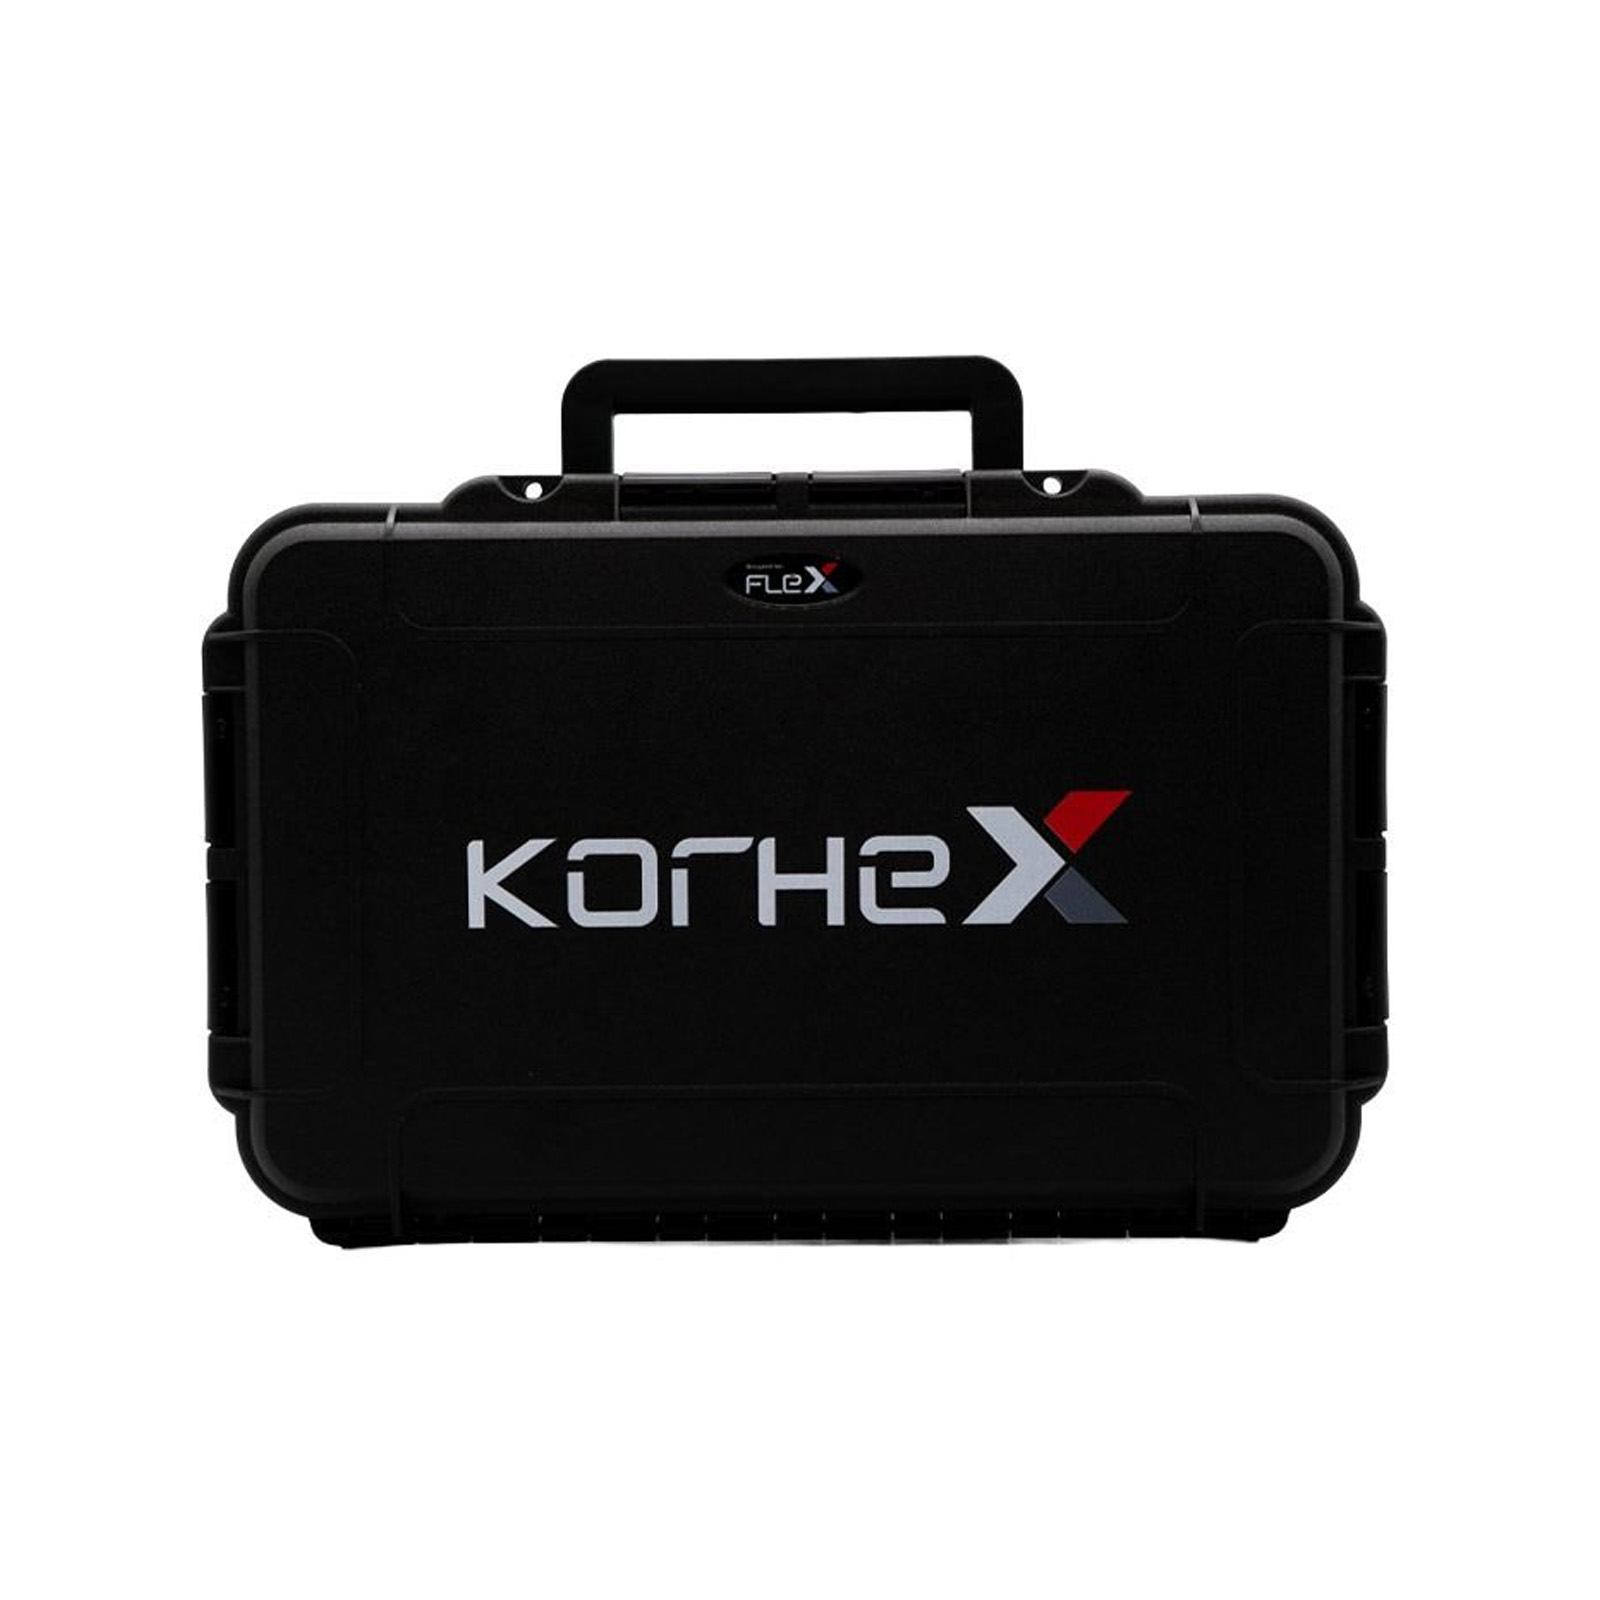
| KRX08.001 | Korhex carrying case |
Korhex FAQ
Q: What is Korhex used for?
A: Korhex is used during supported advanced ECU access procedures where direct interaction with the microcontroller is required. Depending on the ECU and Flex protocol, this can include Boot Glitch and other ECU unlocking procedures.
Q: Is Korhex an ECU programmer?
A: Korhex is not a standalone ECU programmer. It is a dedicated hardware extension of Flex. Flex manages the supported procedure and subsequent ECU programming operations.
Q: Is Korhex a standalone tool?
A: No. Korhex has been developed specifically for the Flex ecosystem and operates through dedicated procedures available in the Flex software.
Q: How does Korhex access an ECU microcontroller?
Korhex is positioned on a specific MCU contact point indicated by the corresponding Flex procedure. The hardware enables the required interaction with the microcontroller during supported access or unlocking operations.
Q: Do I need to desolder resistors?
A: Korhex is designed to avoid resistor desoldering on supported procedures where direct MCU contact can be used instead.
Q: Which ECUs are compatible with Korhex?
A: Compatibility depends on the ECU, microcontroller and Flex protocol. The list of supported applications is continuously updated through Flex releases and can be checked in the Flex Vehicle List.
Q: Do I need a specific Flex license to use Korhex?
A: Customers with a Flex Full Master or Full Slave configuration can use Korhex with the procedures included in their software package.
Customers without a Full configuration can purchase the Flex Boot Glitch License FLS0.20M/S to access supported Korhex procedures.
Q: Will new ECUs be added?
A: Yes. Korhex has been designed as an evolving hardware platform. New supported applications and protocols released through the Flex ecosystem.
Q: Do i need to activate?
A: Hi there, Yes, Korhex requires activation.Once activated, the Korhex icon will appear among the icons on the left; in the top right corner, you will find a tutorial with images.
1. How to activate Korhex?
2. How to Connect Korhex?
3. How to Use Korhex?
1. How to activate Korhex?
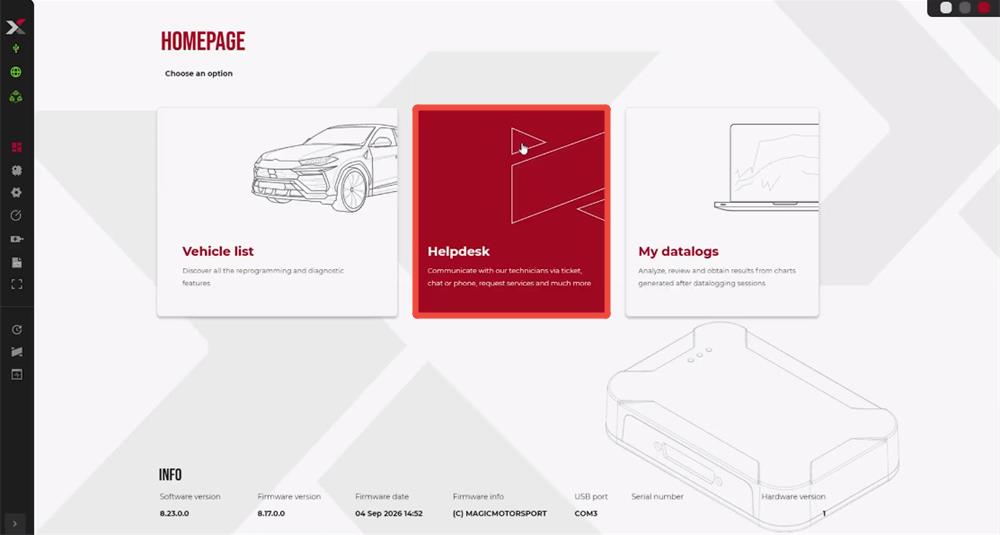
Launch Flex software on your PC, Select Helpdesk to access your User Portal.
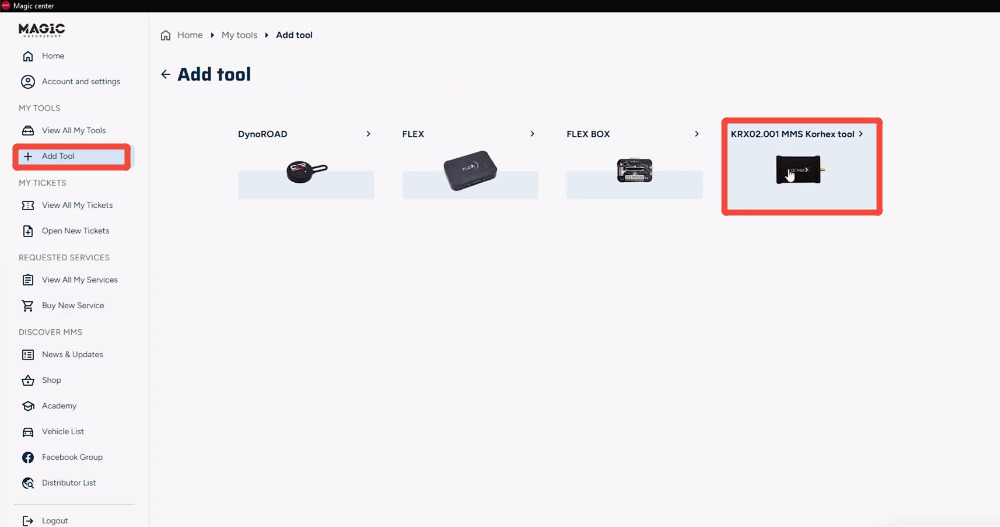
Select Add Tool → KRX02.001 MMS Korhex Tool.
Click Insert serial number → Where is it?
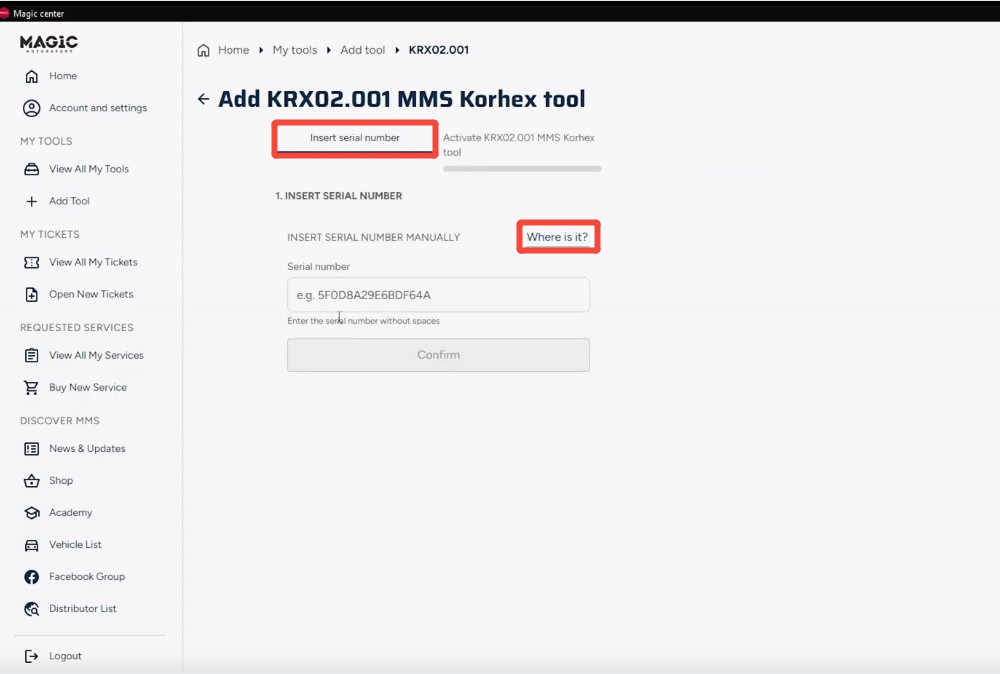
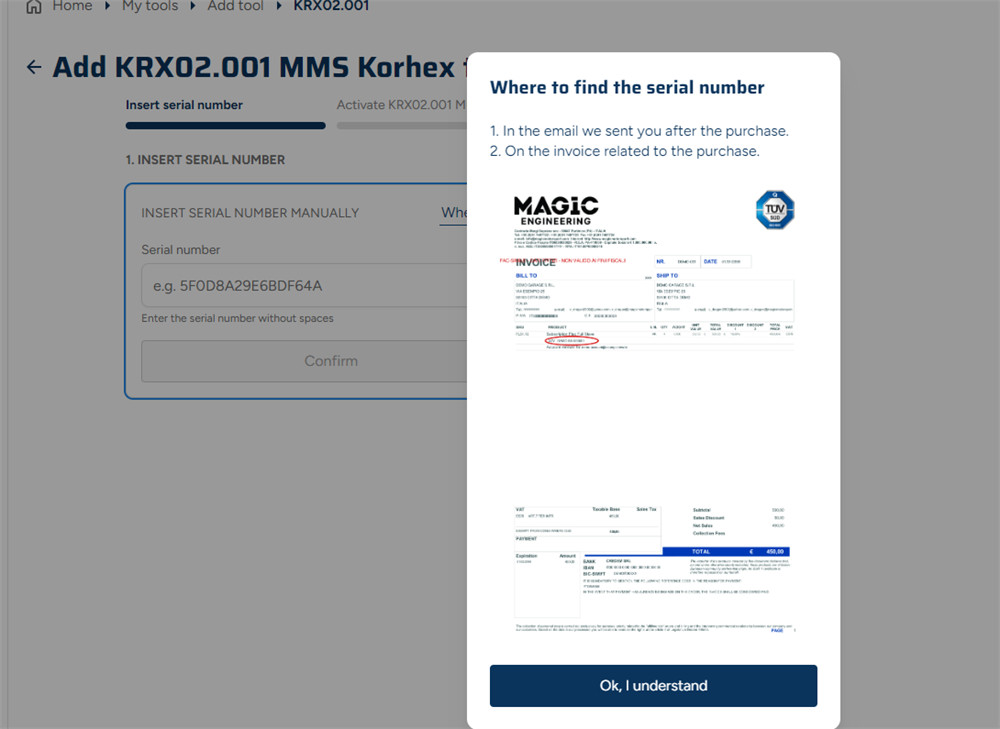
*Where to find the serial number?
1). Purchase email: Check the email Magic Motorsport sent you after your purchase.
2). Invoice: Check the invoice for your Korhex order. The example below shows where the serial number appears on the invoice.
Enter the serial number of Korhex Boot Glitch Tool and bind it to your account.
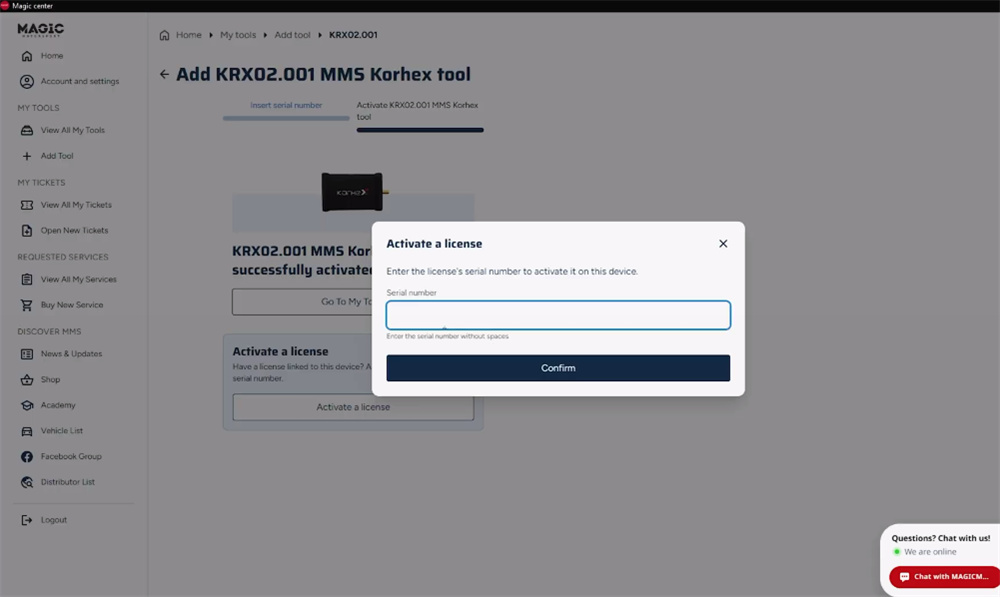
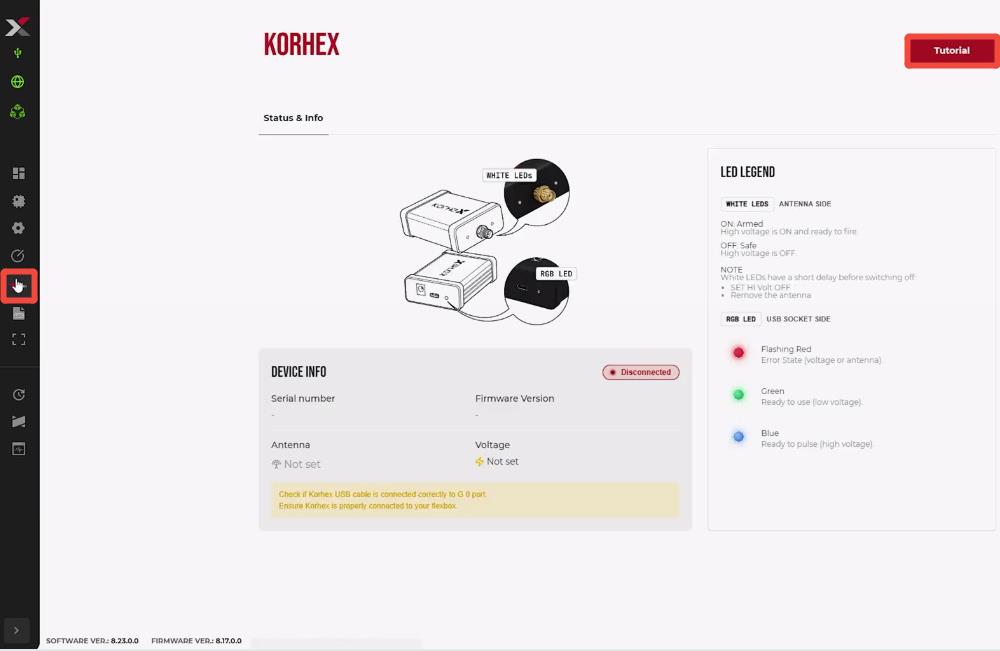
After activating, click the Korhex icon in the left-hand menu of the Flex software. Your device information will then appear.
2. How to Connect Korhex?
Understanding the Status LEDs
Because the Korhex is a high-voltage device that emits electromagnetic field interference, paying attention to the status LEDs is critical:
Intermittent red flashing indicates a problem or error with the connection.
Green light shows low voltage—the tool is simply powered, similar to when the Flex tool is connected to a 12V power supply.
Blue light indicates high voltage—this is when the tool is carrying out the connection to the ECU and enabling the glitch unlock. During this stage, do not touch the device, the ECU, or the connections.
Connecting the Tool: The Seven-Step Tutorial
The Flex software includes a tutorial showing how to connect the Korhex kit to the Magic Motorsport Flex tool. The key steps include:
Connect the circuit board to the Flex box—align it with the screen, push down gently, and secure with the two plastic clips.
Connect the USB-C type cable to the circuit board, then to the Corehex. Remember this cable is specific to the Korhex tool only.
Prepare your ECU and place the Korhex on the bench ready for connection.
Connect the power cable, using the extender for extra room, and select the appropriate plug for your region.
Connect the antenna carefully—align the small single-point connector correctly, rest it gently, and tighten a few turns by hand. Pinch tight is sufficient; no wrench is needed.
Use the masks where available—these sit on top of the microprocessor for accurate alignment. If no mask has been developed for a particular ECU, it is still possible to connect safely without one, but using a supported 3D-printed mask is highly recommended for speed and efficiency.
Align the Korhex with the antenna through the alignment hole in the mask to the correct location on the microprocessor.
3. How to Use Korhex?
Selecting the ECU and Making Connections
After the tutorial is complete and the Korhex is fully connected, select your vehicle and ECU in the software. For the Bosch MD1 ECU, the bench and boot glitch method is required for the locked version—note that an active subscription is needed to use this function.
Following the connector manual, make the typical bench connections: two powers, one earth ground, and two communication connections. A crucial point is that the two power connections must go to their corresponding ports on the Flex box—port A1 serves as the power supply (red), while port A4 works as an ignition cycle switch (pink). Just because both leads are red does not mean they perform the same job.
Because the provided circuit board is used with the Korhex, no bridge connections into the Flex tool are needed, and there is no need to locate and remove the small resistor—making the process significantly more efficient with fewer wires and cables.
Alignment and the Recommended Jig
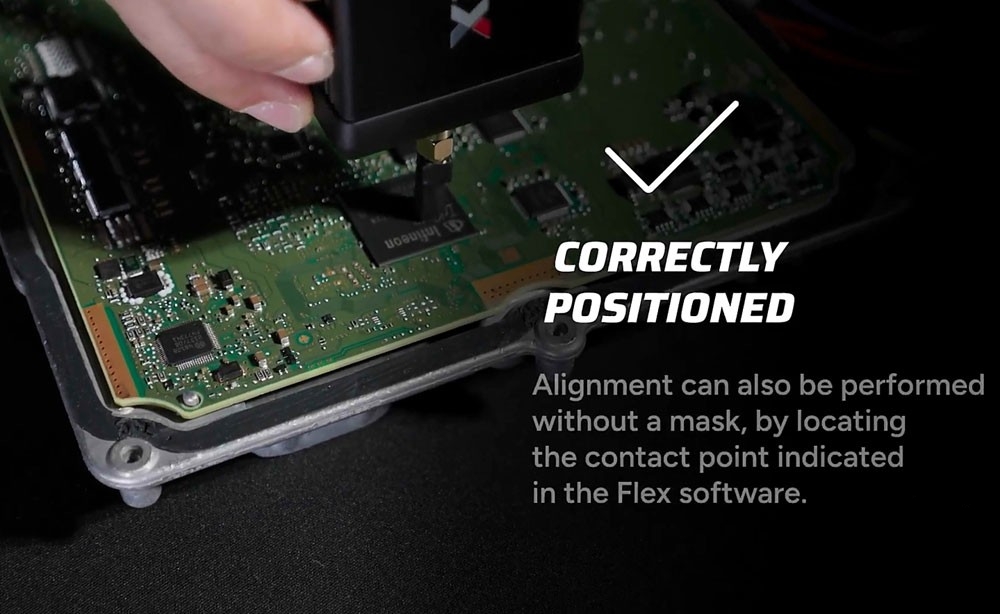
The manual shows the precise glitch zone: 7.8 mm down from the left-hand side and 14 mm along from the bottom edge of the microprocessor. Alignment can be done by marking the processor with tape or by aligning with the yellow highlighted dot.
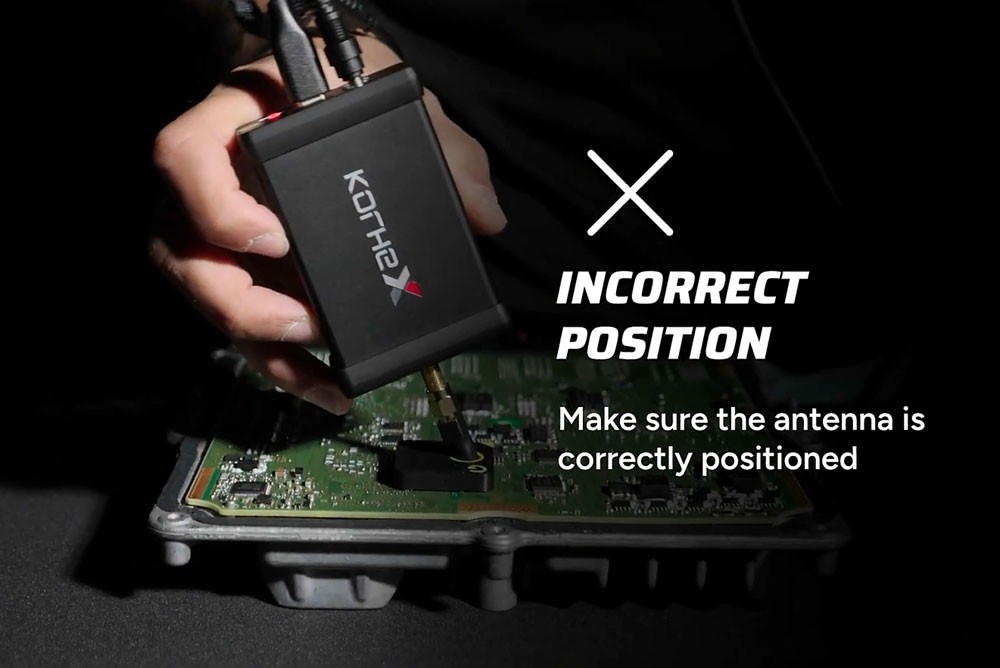
A key pro tip: do not hold the Korhex in position by hand during communication. Slight movement over a few seconds to a few minutes can cause errors during the unlock or even failure of the processor itself. Instead, use an adjustable arm or jig such as the Magic Motorsport mini bench tool, clamping the Korhex in place and ensuring it is mounted vertically, not at an angle, so the electromagnetic field goes directly to the required point on the microprocessor.
The Unlock Process
With all connections verified, press connect. After initial communication—which took 51 seconds in the demonstration—the status shows successful and the LED turns green.
Best practice before unlocking: take a full backup of the ECU. This ensures that if an error occurs during the unlock, you have a backup to rewrite and recover the ECU. Save all to capture the backup along with EPROM, flash, and micro where applicable.
Then press unlock. A warning reminds you that interrupting the process or disturbing a connection can cause irreparable damage, so ensure the ECU will not be disturbed and a stable power supply is connected. During the unlock, the progress bar may move to 100% several times—this is normal as it moves through various parts of the glitch process.
The unlock completed in 2 minutes 54 seconds—massively quicker than the traditional glitch method, which can take up to 25 to 40 minutes in some cases, and that's just for the glitch to go through. No soldering is required, and no tiny resistors need to be found and soldered back onto the ECU.
After the Unlock
Take a fresh read of the ECU—at minimum of the flash or micro you intend to tune—and tune that file. The recommended workflow is: backup, unlock, fresh read, modify, tune the fresh read.
Part IV: Korhex - Guide to Proper Positioning
Any incorrect positioning can cause irreparable damage to the microprocessor,
Correctly positioned:
Align the antenna and form a 90 degree angle with the ECU, not just the angle of the Korhex device.
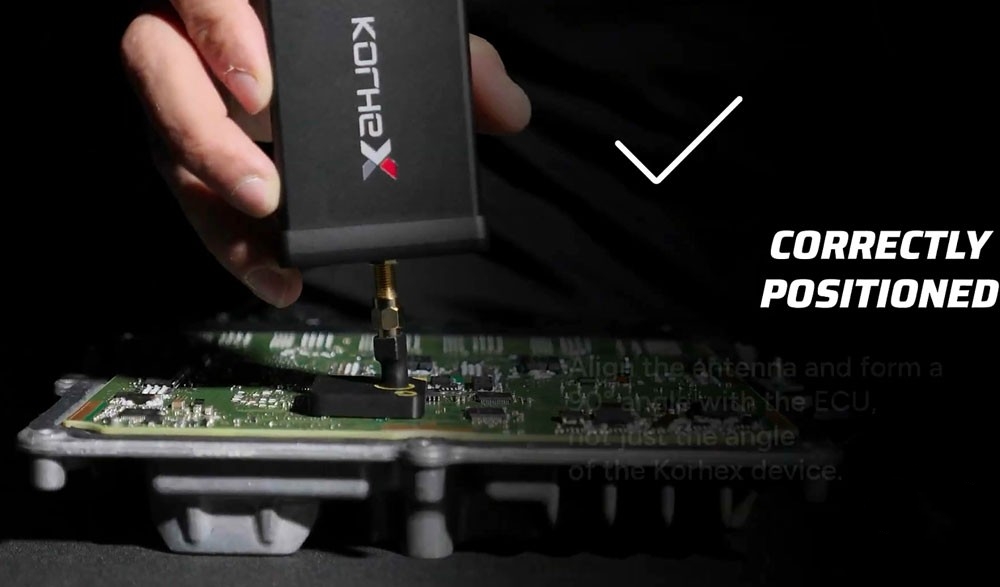
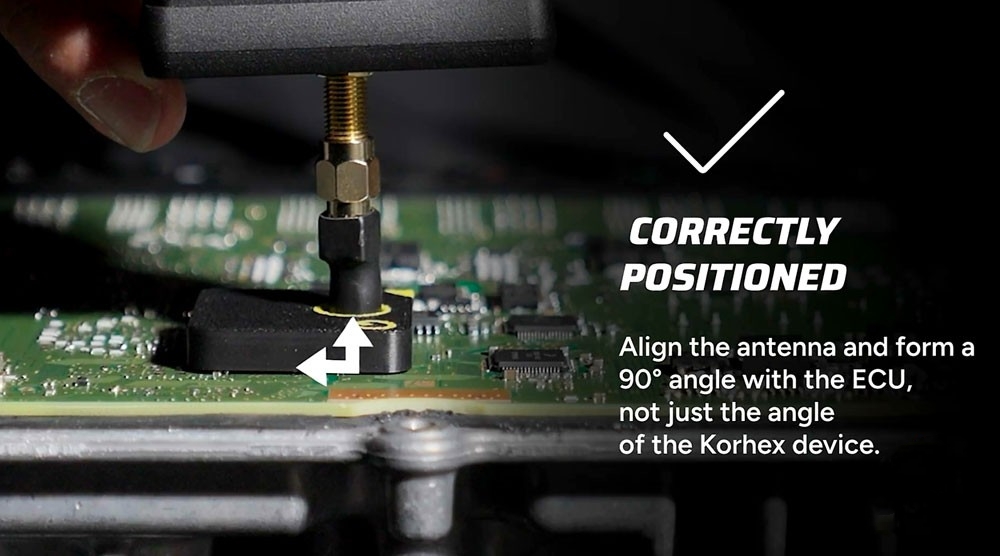
Make sure the antenna is correctly positioned.
Correctly positioned.
Alignment can also be performed without a mask, by locating the contact point indicated in the Flex software.
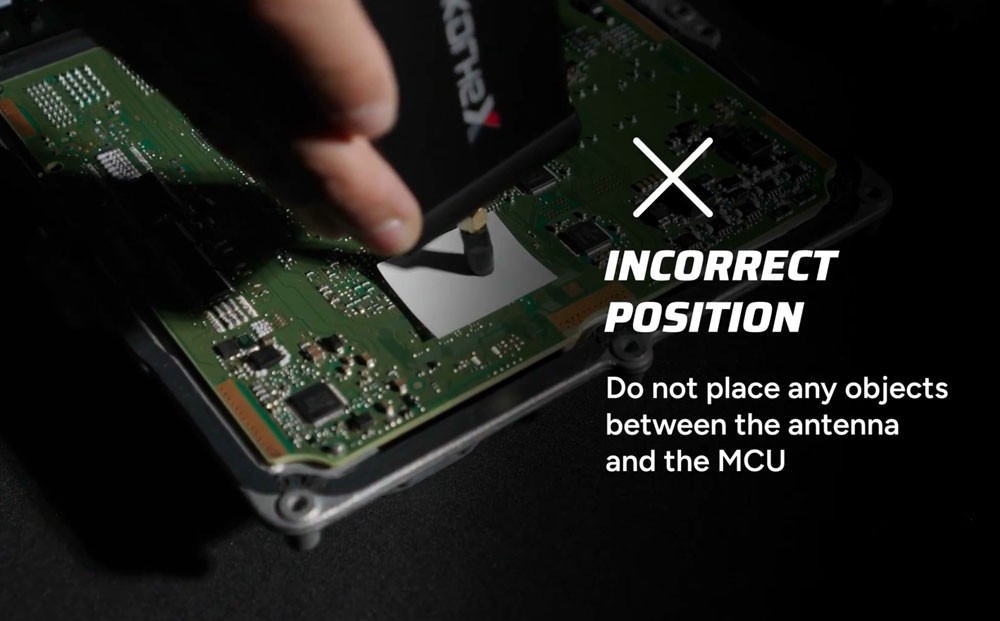
Incorrect Position:
Check that the mask is positioned correctly.
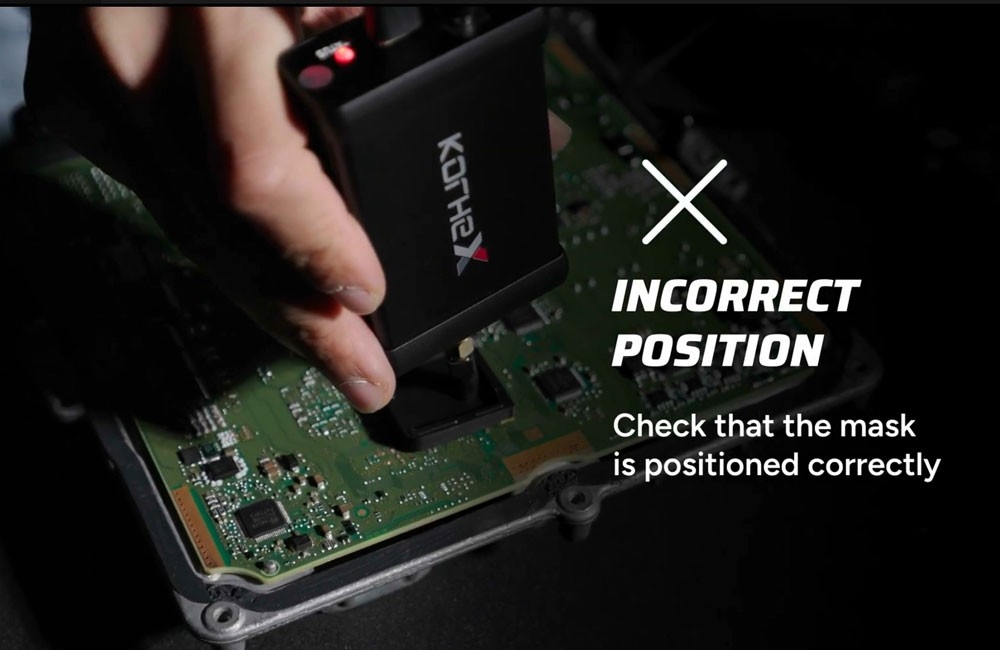
Do not place any objects between the antenna and the MCU.
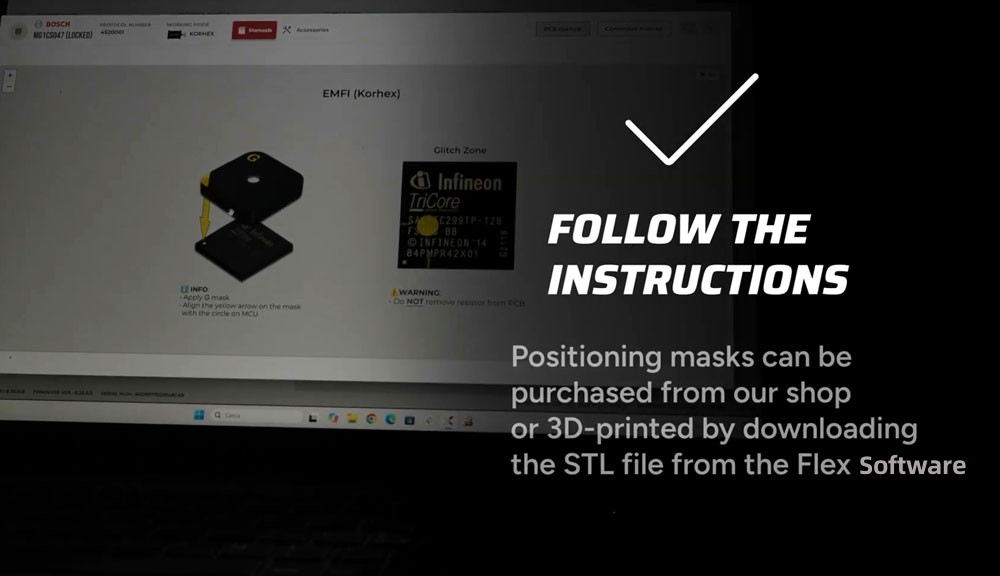
Follow the instructions:
Positioning masks can be purchased from Magic Motorsport shop or 3D-printed by downloading the STL file from the Flex software.







Shipping method and delivery time:
US, UK ,RU Warehouse: 2-4 working days. We have stocked up hot sale items in US, UK ,RU Warehouse, Fast Delivery No Tax. But if overseas warehouse is sold out,we will send from Hongkong.
Ship From UK, No Tax
Ship From US, No Tax
Ship From EU, No Tax
DHL Shipping: 2-4 working days. Usually we declare lower value on DHL invoice. If your address is remote area for DHL, customer will need to pay remote cost about 35USD or ship by EMS or YANWEN. Please leave message if you have any special requirement.
Yanwen Express: 5-10 working days. No Tax or remote cost for European Countries.
Top 10 reasons to buy from chinacardiags.com website
9.Safe purchase, and your privacy is secure.
10.We provide one year warranty and free technical services.
Contact information:
Whatsapp: +8618223445829
WeChat: seven424424
Whatsapp Group:
LLnn0gcToGG2UjpHuZmcpG
